I'm on a roll this week. When I have vision, I just have to make it happen! And now, you get to benefit from it, since I actually took step-by-step pictures this time around :)
Just FYI: This skirt, as I made it, is probably a Girls' size 6. Bella wears a size 5 now, and she has some growing room in this one. (Just the way I like it!)
This is what I started with. I accidentally cut it before taking a picture, but I did the best I could to get the same affect...imagine with me:
Cute Baby-doll style shirt. It just looked kinda weird on. It hit in an odd spot in the length, and the bodice was just awkward. So...a skirt for Bella...
First, I cut the bodice from the bottom of the shirt. I just used the seam-line as a guide.
This fabric was a bit thin. I didn't have any other shirts in the stash that I could use for an underskirt, but I had some extra white fabric sitting in my closet, so that's what I used. You can use whichever.
If you use another shirt:
make sure to use the bottom edge as your bottom edge of the underskirt (so you don't have to do a hem), and make it so that the bottom edge of the underskirt is a little shorter than the outer skirt.
Turn the bottom of the baby-doll shirt inside out and use it as a guide to cut the inside fabric (extra fabric or another shirt), so that you are able to include seam allowances. (you'll need to cut 2 layers!)
Next, sew the two pieces of the "inside skirt" fabric on both sides, using a 1/4" seam allowance, and serge to finish seams (if you don't have a serger, you can use a zig-zag stitch on the outside of the seam. The point is to finish the seams to make them more durable, and less likely to fray.)
Turn the inside skirt fabric right side out, but keep the outer skirt fabric inside out.
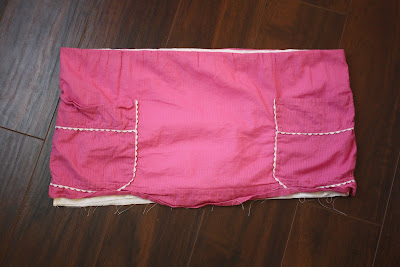
Put the "inner" fabric inside the "outer fabric, so that the right sides are together. It should look like this:
Pin together at the top, matching the side seams, like this:
Sew a 1/4" seam along the top edge and serge.
Turn right side out.
Using a zipper foot (I refer to it as my top-stitching foot), top-stitch the top seam, along the top edge, using the right side of the zipper foot as your guide.
Mark the middle of the back of the skirt with a pin.
Starting about 1/2" from the pin, sew a casing large enough for your elastic to pass through easily.
I used 5/8" elastic and made a 1" casing (I had to make my own mark on my machine for this one...)
Don't connect the beginning and end of the stitching!!
Make sure to leave about an inch for an opening. Like this:
Measure your elastic, based on waistline measurement (where your little one wears her pants/skirts) +1 inch.
Bella's measurement was 21", so I measured 22" of elastic.
Attach a safety pin to one end of the elastic and use it to guide the elastic through the casing (in between the two skirts).
Make sure not to lose the loose end!!
Check to make sure the elastic isn't twisted anywhere.
Now, overlap the ends of the elastic about an inch, and sew together, back and forth, to secure. Do this in two places - just a bit from each of the ends.
Tuck the elastic into the casing, and secure in place by making a stitch from the top-stitch seam down to the casing seam, and back.
Stretch out the elastic to evenly distribute the gathers.
Make a stitch on the side seams, over the elastic, from the top-stitch to the casing stitch, just like you did on the back of the skirt.
Don't skip this step!!
This secures the elastic, and keeps it from rolling and twisting.
Complete the casing seam in the back of the skirt.
If no hemming is required, then ignore this next step. If, however, you used extra fabric for an underskirt, and you need some help with hemming, here's what to do:
Fold the bottom edge of the fabric over 1/2" and iron in place, all the way around, using a measuring tape to make sure it's even.
Now, fold this over again, with the edge of the fabric now as close to the fold as possible. Press and pin in place.
Use a zipper foot again (but use the left side as a guide this time) and stitch along the top edge of the hem.
It should look like this when finished:
Turn it all right side out, and look what you have:
Just makes her want to twirl around and dance barefoot in the grass...
Let me know if you have any questions, and I'll try to answer them the best I can :)
Enjoy!!


